![]()
![]()
![]()
![]()
![]()
![]()
![]()
This is a great write-up that I found. I apologize, I don't remember who to give credit to.
How to make a 45 degree double flare
in 3/16 inch brake tubing
There are several types of flares used. Most automotive brake lines
use a 45 degree double flare, otherwise know as an inverted flare.
However more modern vehicles are made with bubble flares. Don't
confuse these with AN flares which are a 37 degree single flare.
Then there are pipe fittings, but that's another story.
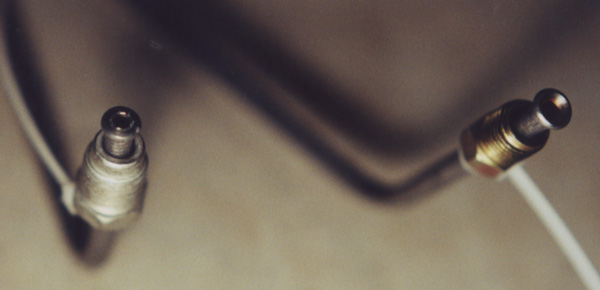
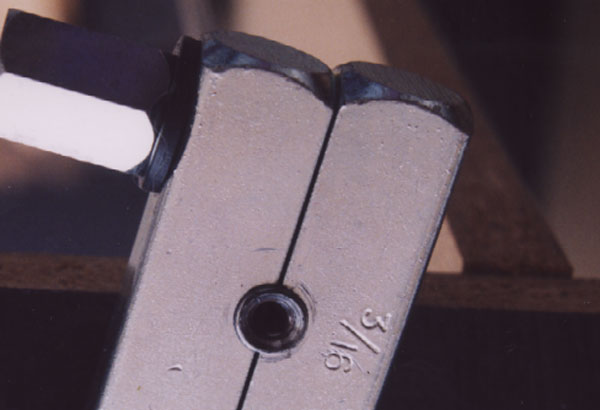
A brake
tube with a bubble flare is shown on the left in the first picture
below, and a double flare is shown on the tube to the right in
that picture. You can
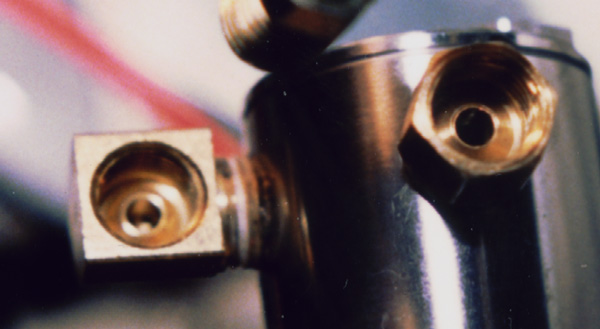
see how the double flare will fit into the female inverted flare fittings
shown in the second picture.
|
| Here are the steps to make a 45 degree double flare in 3/16 inch brake tubing |
| 1. |
 |
Cut the tubing to desired length. Make sure the cut is square to the length of the tubing. I used a mini tubing cutter. You will notice that the tubing openings are collapsed a little after the cut is made. | |
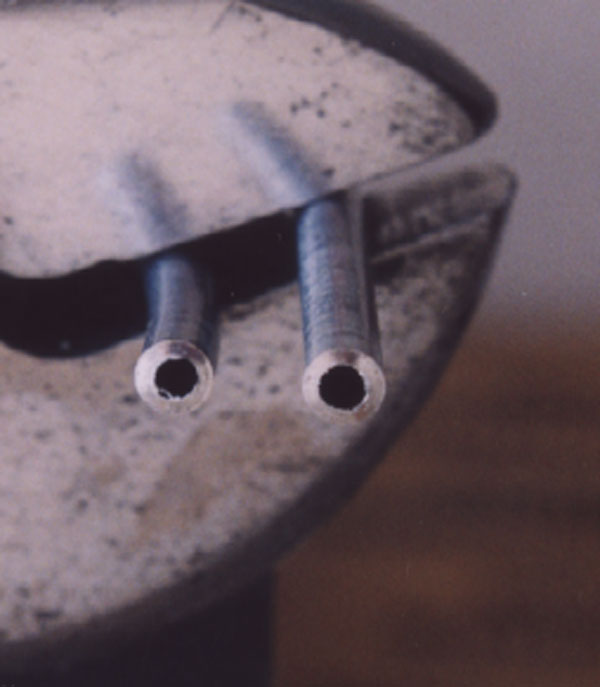
| 2. |
 |
Take a 7/32 inch drill bit and put the point into the tubing opening and turn by hand to deburr. You can compare the size of the opening before (on left) and after (on right) this deburring process. A 7/64 inch drill bit will slide into the tubing on the right and a 1/8 in drill bit will not. The 7/64 inch drill bit will not fit into the undeburred tubing end on the left. | |
| 3. |
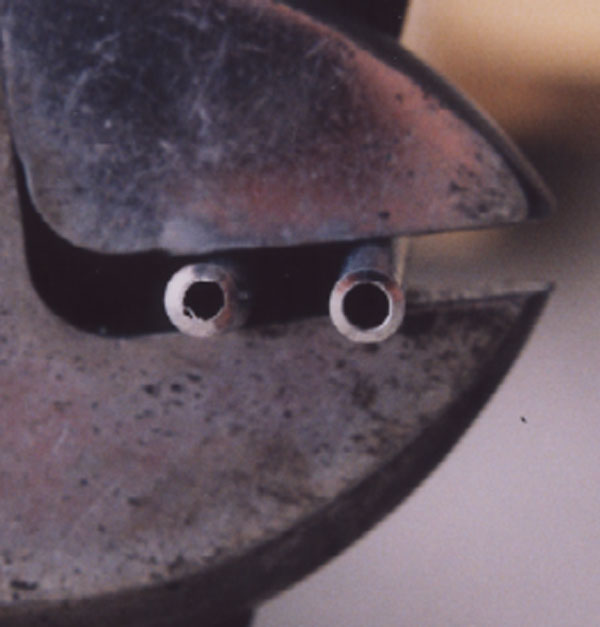
 |
 Now take a file (Craftsman 931265, 6 inch mill file) and chamfer
the edge of the tubing about 1/16th inch.
Now take a file (Craftsman 931265, 6 inch mill file) and chamfer
the edge of the tubing about 1/16th inch.
|
|
| 4. | Put the Tubing Nut ON! PUT THE TUBING NUT ON NOW!! | Very Important to remember to put the tubing nut on now or you'll have to cut off the beautiful flare you are about to make. | |
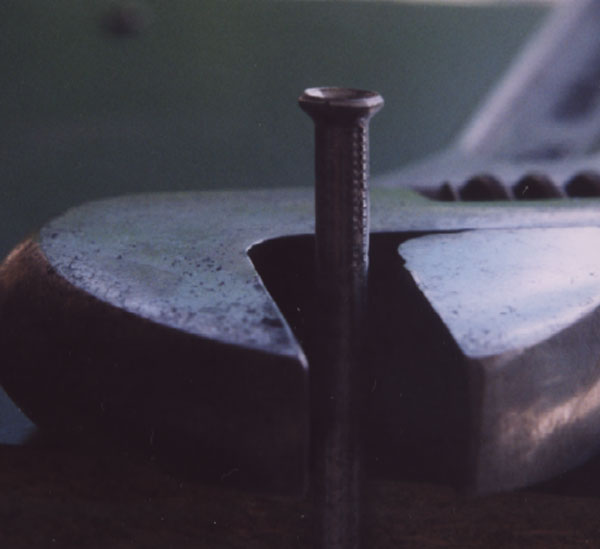
| 5. |
 |
Insert the tubing into the flaring tool (Performance Tool Double Flare Tool W80670 made by Wilmar Corp and purchased at Sears) and adjust until the tubing sticks out the proper length per your tools instructions. For my tool the die is used as the guage so the tube just fits under the edge of the inverted die. Tighten the tool to hold the tubing. Make sure, as you continue the steps, that the tubing does not slip in the tool. I had a tool from another manufacturer that would not hold the tubing tight enough. After struggling with it I found the Performance Tool and threw away the other brand. I put a little grease on the tip of the tubing and on the flaring tool anvil. Now invert the die and put the pin into the tubing end and attach the anvil. Compress the tubing until the die makes contact with the tool clamp. | |
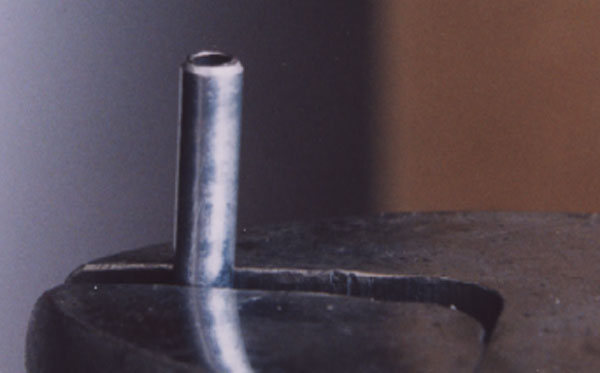
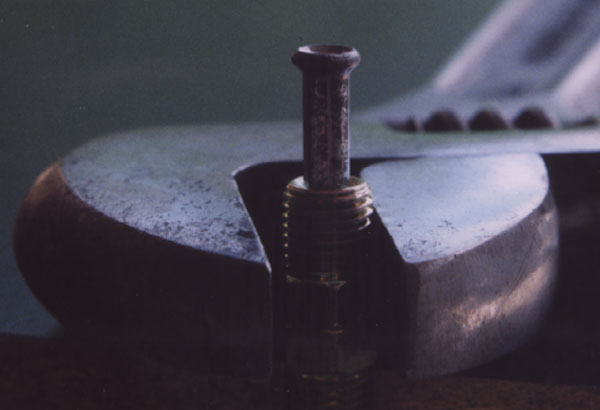
| 6. |
 |
After removing the anvil and the die from the tubing this picture shows what the tubing looks like after the above step. Essentially it is a bubble flare. | |
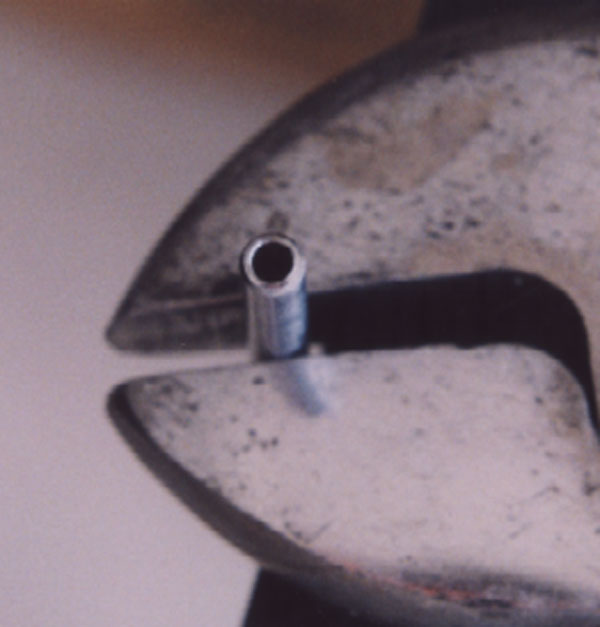
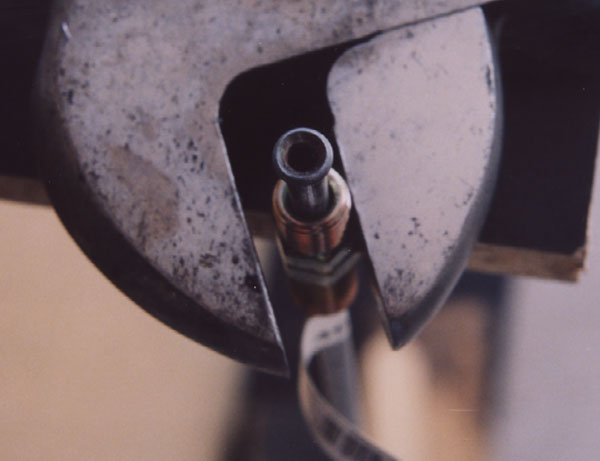
| 7. |
 |
Complete the double flare by placing the tool anvil in the center of the tubing and turn the press until tight. After removing the anvil this is what the completed double flare looks like in the tool clamp. | |
| 8. |
 |
 With practice the flare you make should look just as good as
one on the end of brake tubing purchased at your local parts store.
With practice the flare you make should look just as good as
one on the end of brake tubing purchased at your local parts store.
Mine |
|
 |
 Commercial |
This is meant to be a guide that will help you get started. Please consult any manual that accompanies your Flare tool for proper application.